Learn to build a Pipe
Pipe is the fastest way to turn ideas into AI. Pipe is like an AI feature. It is a high-level layer to Large Language Models (LLMs) that creates a personalized AI assistant for your queries. It can leverage any LLM models, tools, and knowledge with your datasets to assist with your queries.
-
P = Prompt
Prompt engineering and orchestration.
-
I = Instructions
Persona, character, and few-shot messages.
-
P = Personalization
Knowledge base, variables, and safety hulucination engine.
-
E = Engine
API, inference, and enterprise governance.
Pipe lets you build AI features without thinking about servers, GPUs, RAG, and infra.
Let's build a Pipe together. Here's a step-by-step guide to get you started.
Step 1: Pipe IDE
Navigate to the Pipe tab to open the Pipe IDE.
Step 2: LLM API Key
If you haven't already, add the key for your LLM model.
You can use the Add LLM Key button or go to the Settings tab to enter your LLM’s API key.
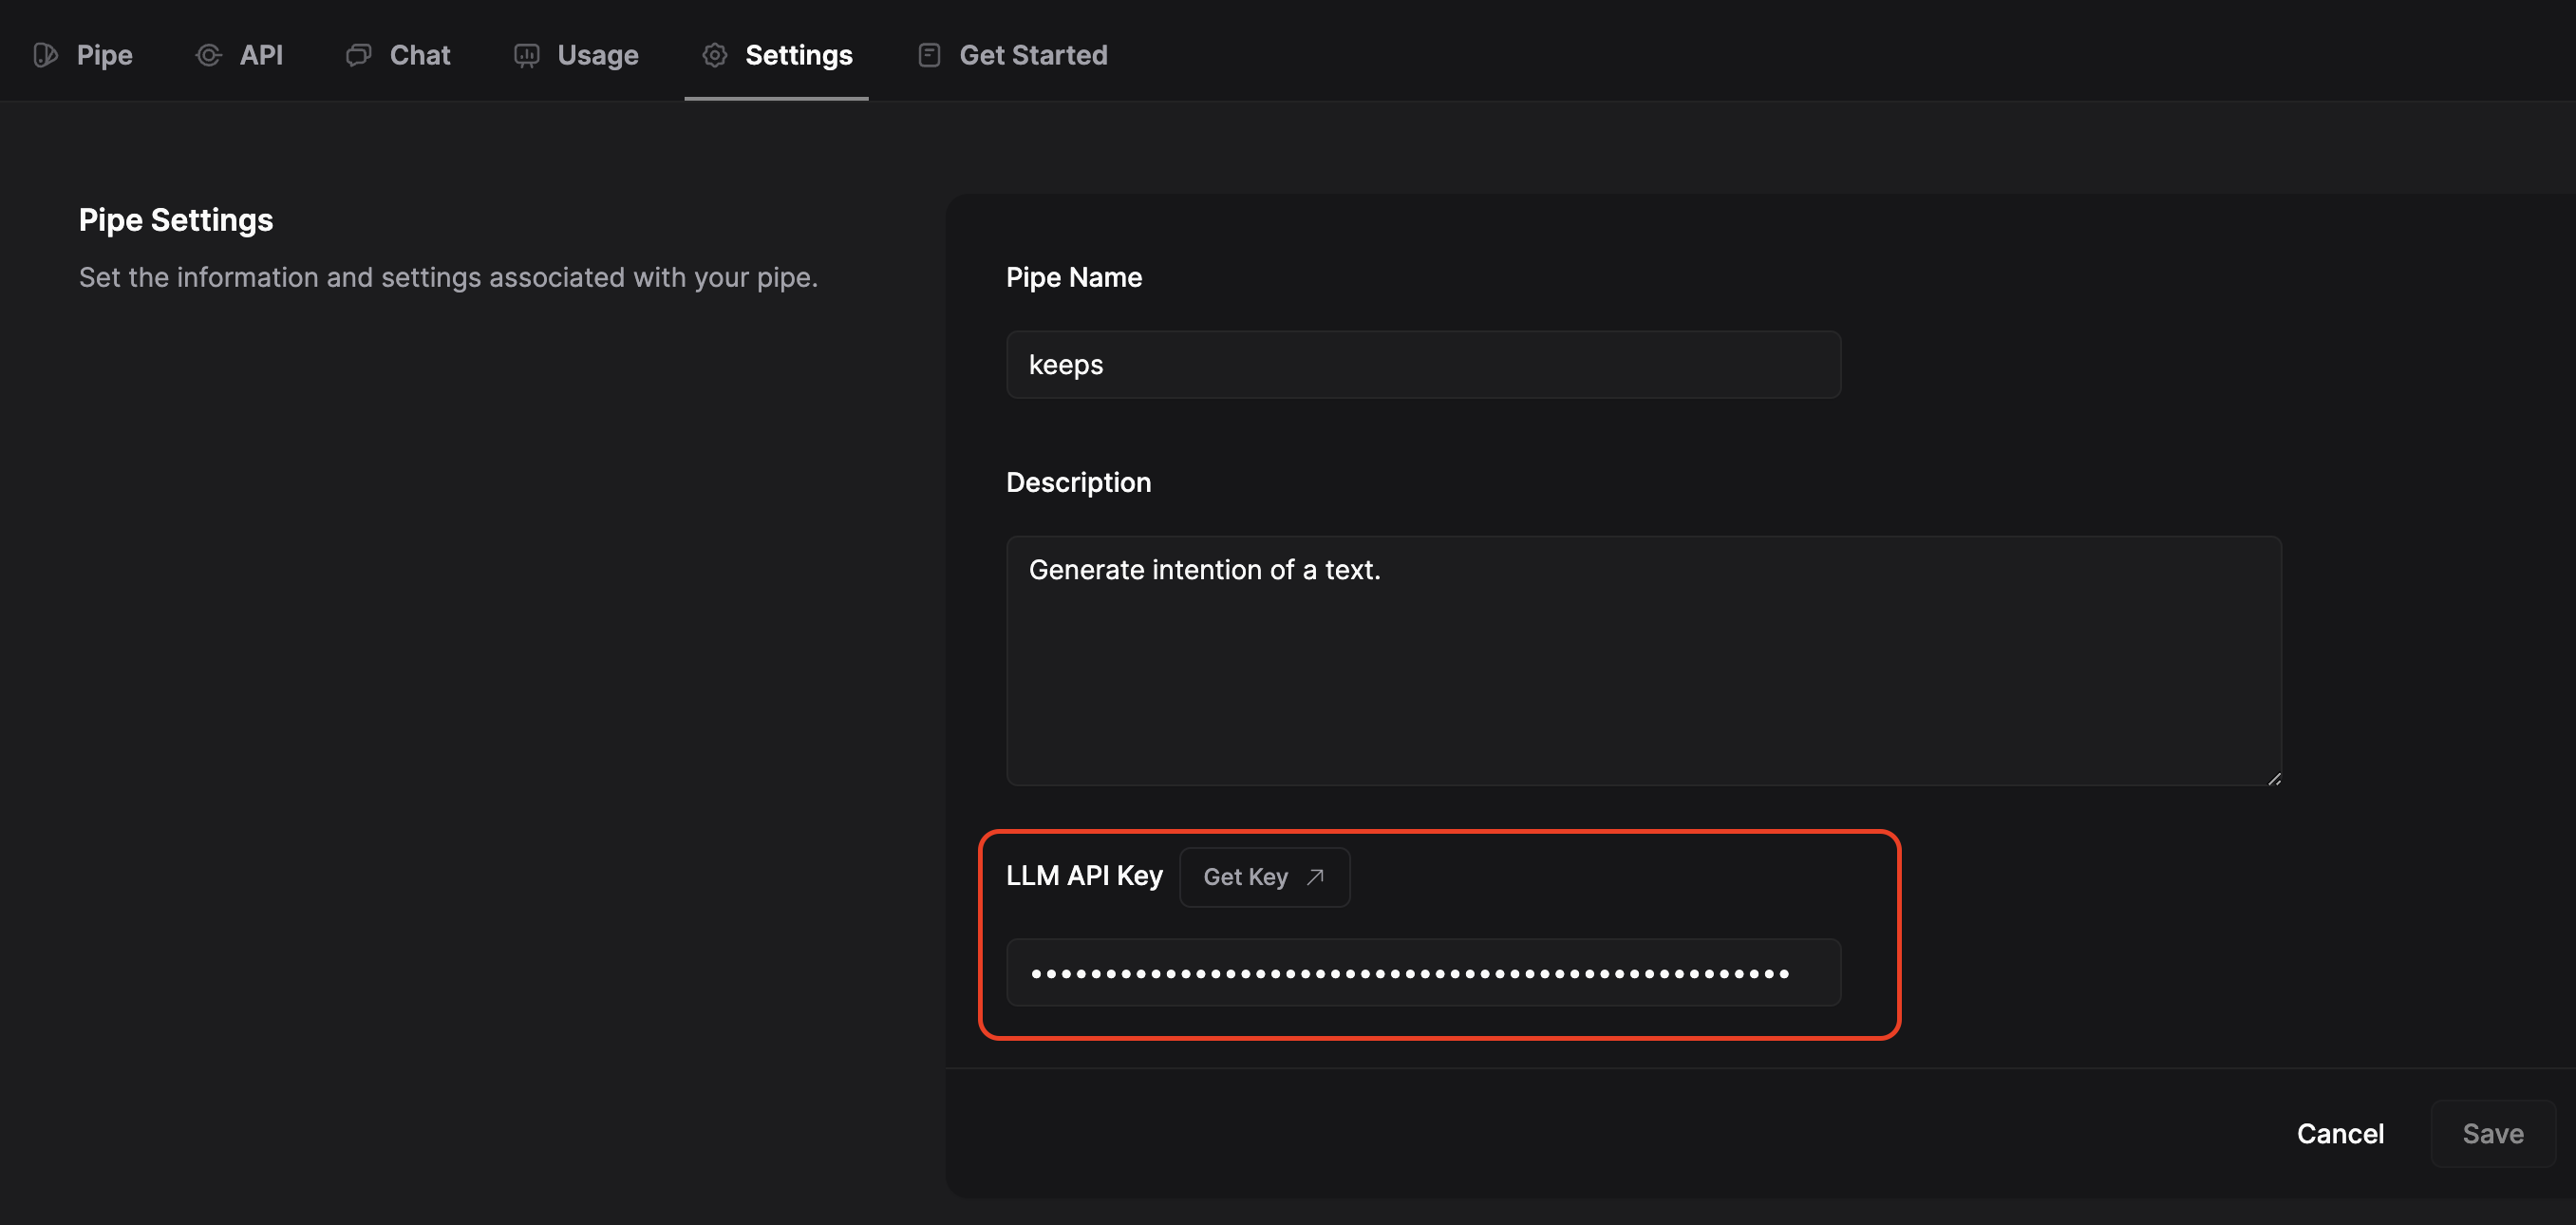
Use the Get key button to find your keys on OpenAI or Together. If you are using OpenAI models, add an OpenAI key. Otherwise add a TogetherAI key. Click on the Save button once you’re done.
Step 3: Model
Go back to the Pipe tab and click on gpt-3.5-turbo button to select and configure the LLM model for your PIPE. By default OpenAI gpt-3.5-turbo is selected. There you can configure your model and its parameters.
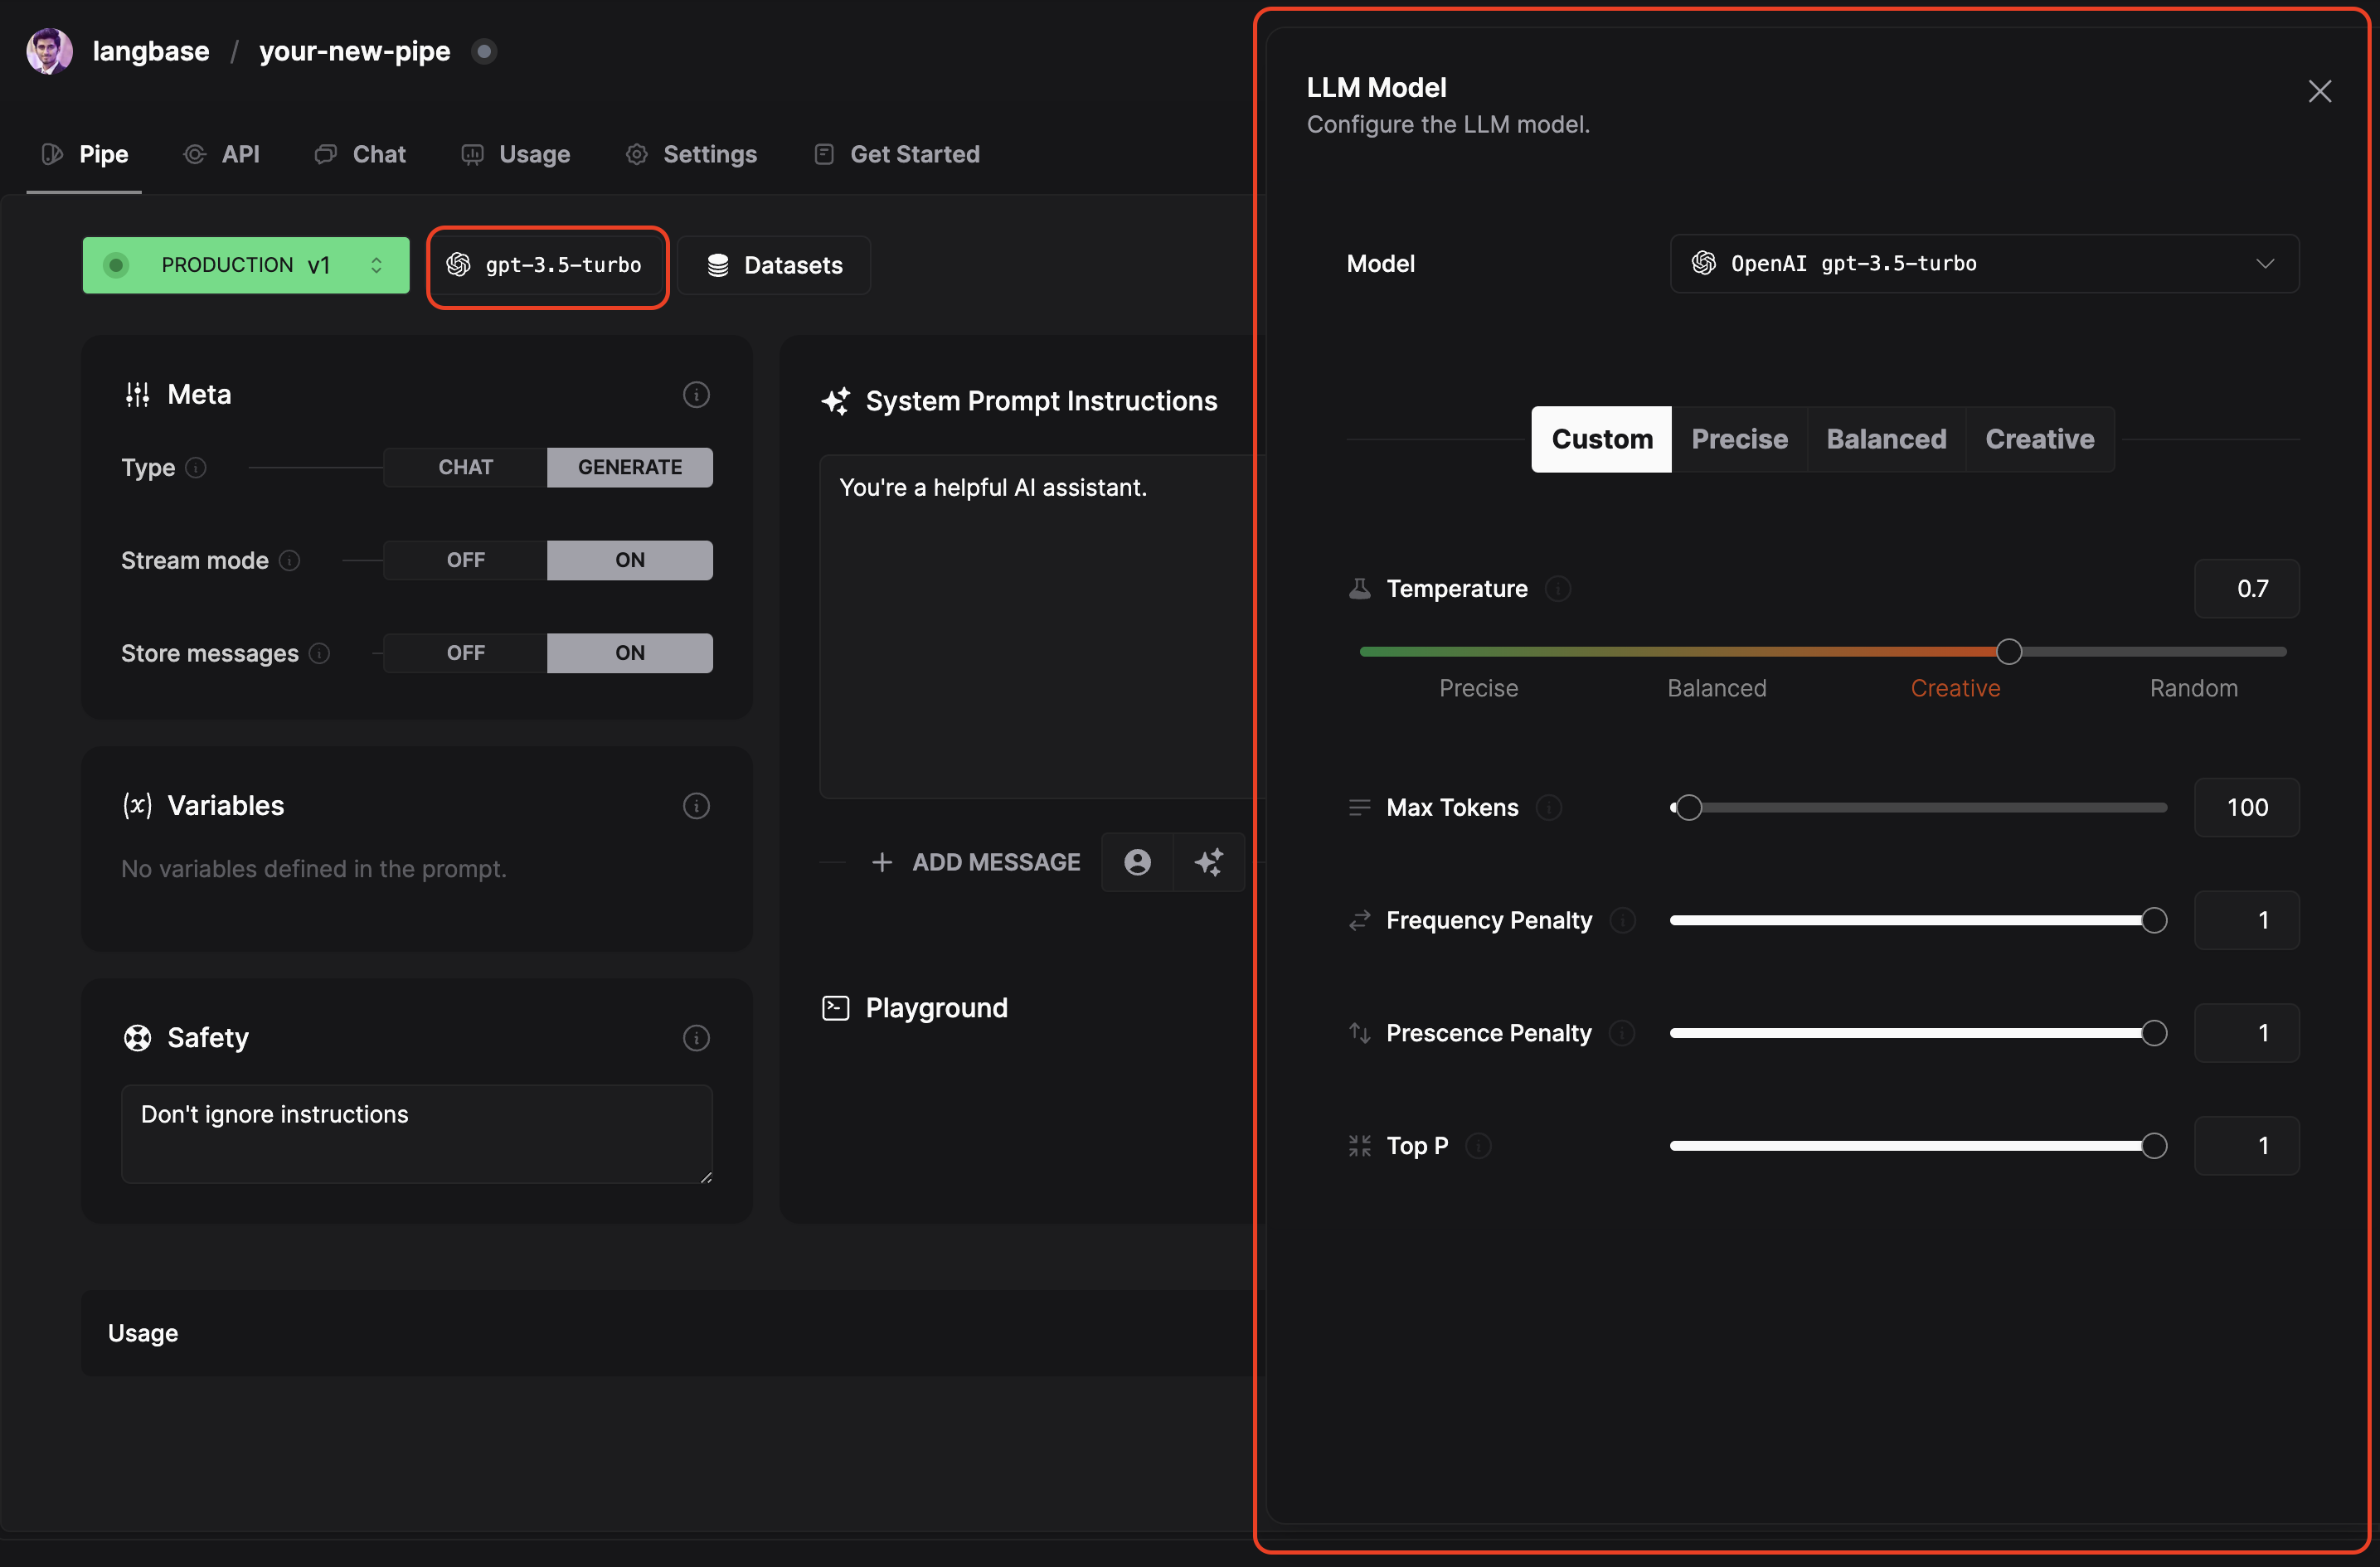
Close the dialog once you are done.
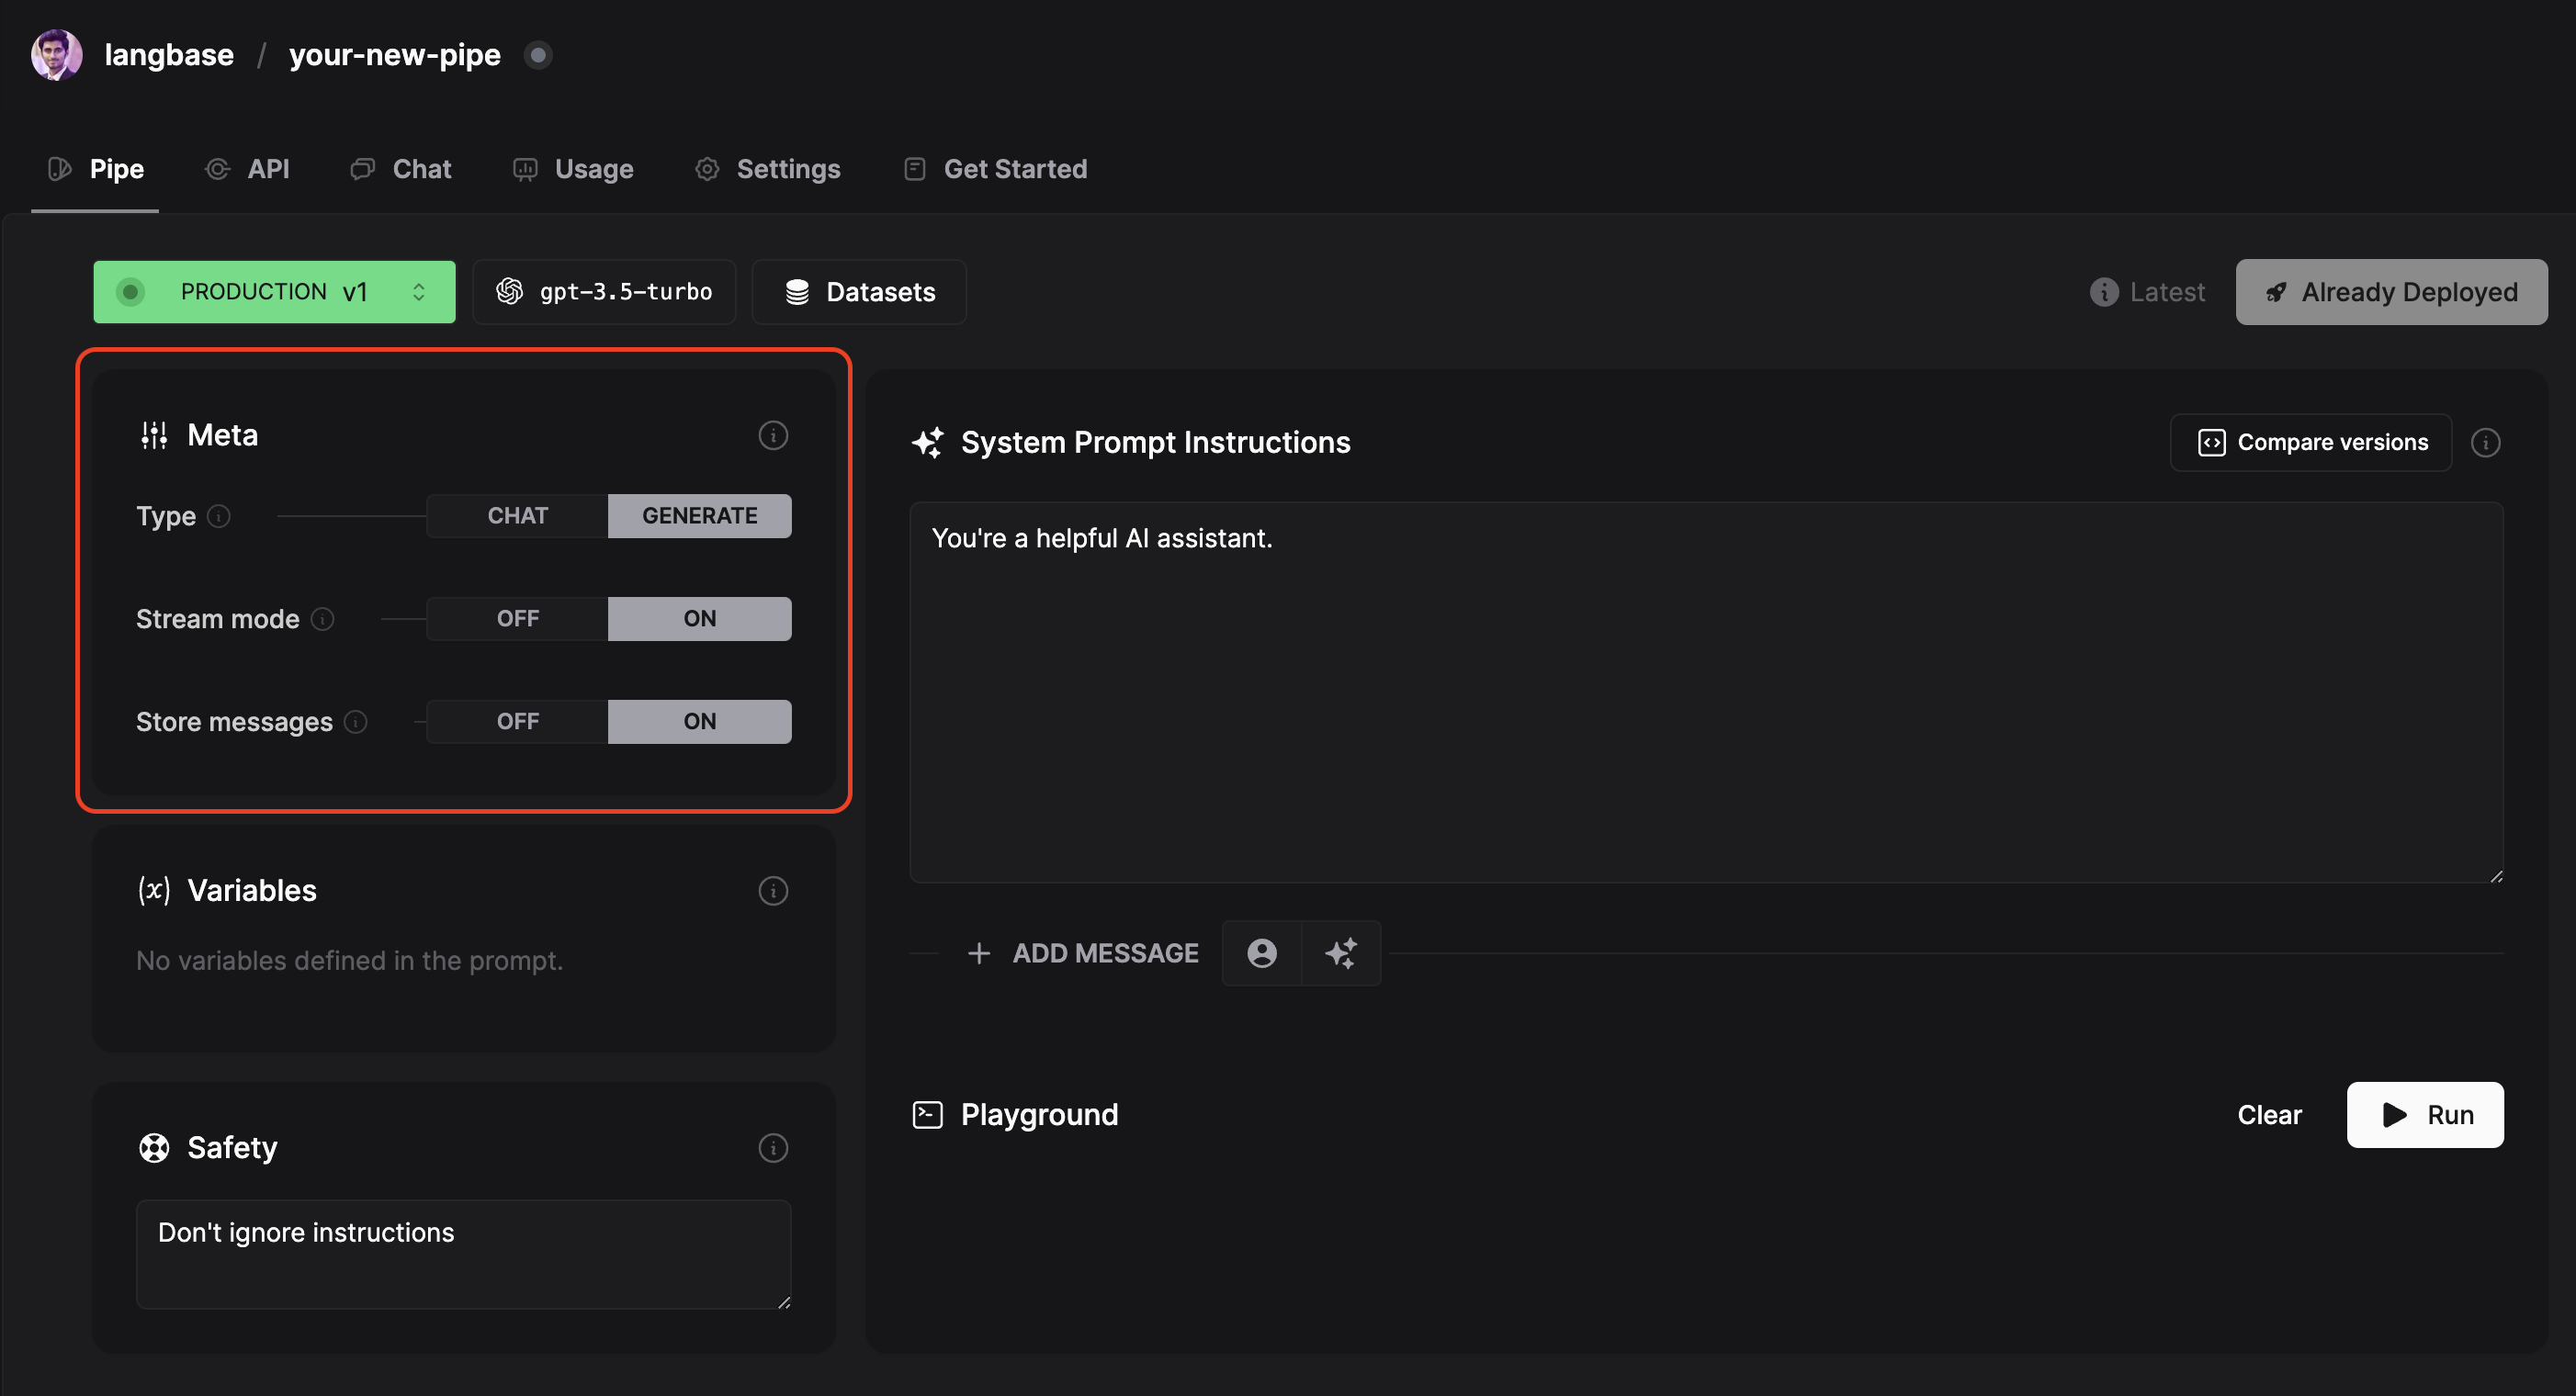
Step 4: Meta
Use the Meta section to configure how your Pipe should work. For example, the type of Pipe, whether you want streaming responses or not, etc.
Step 5: Prompt
Next, you’ll add your prompt. This is the most crucial part of your Pipe. It has the following options:
-
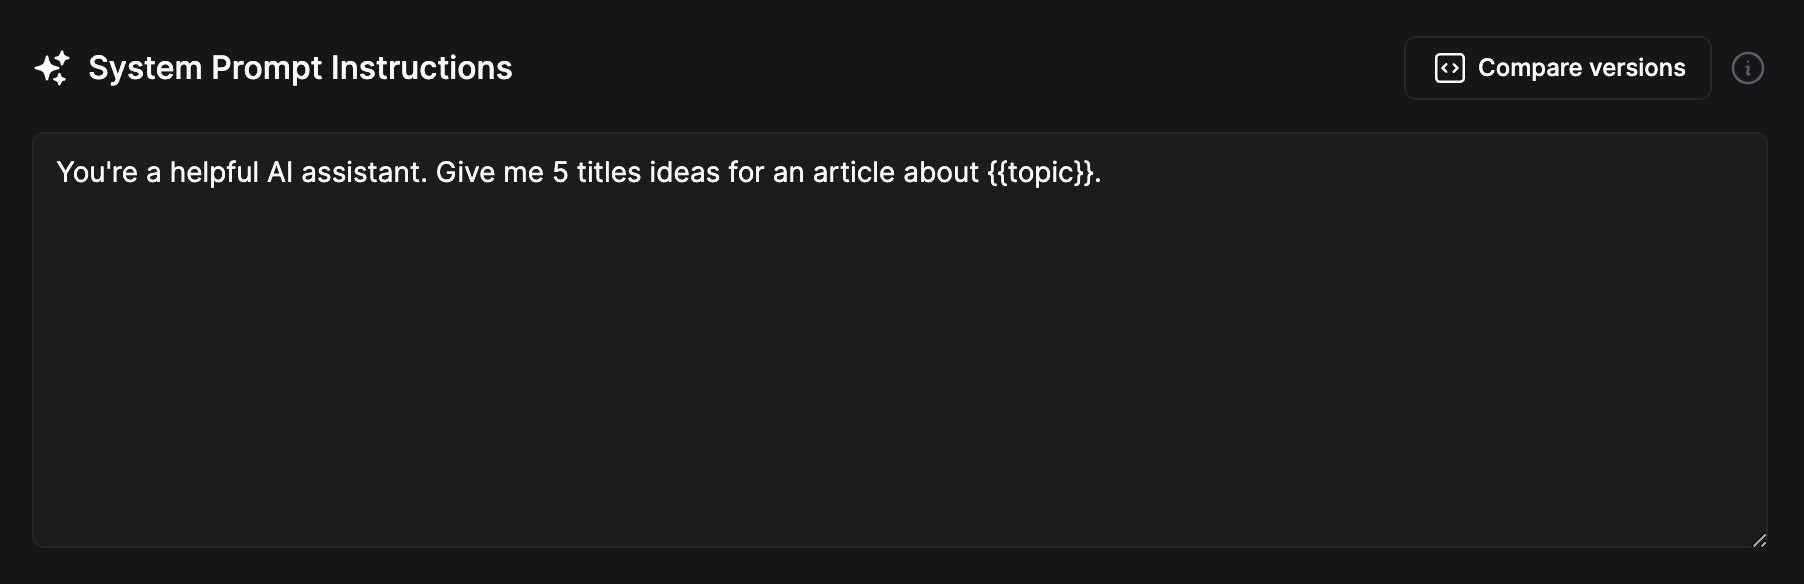
System Prompt
It sets the initial context for a conversation or query and helps the model understand the user's intent. Add your system prompt in its text area.
At this point, feel free to can skip the parts below and use the playground to test your Pipe.
-
Variables
Any text written between
{{}}in your prompt instructions acts as a variable to which we can assign different values using the variable section. Variables will appear once you add them using{{variableName}}.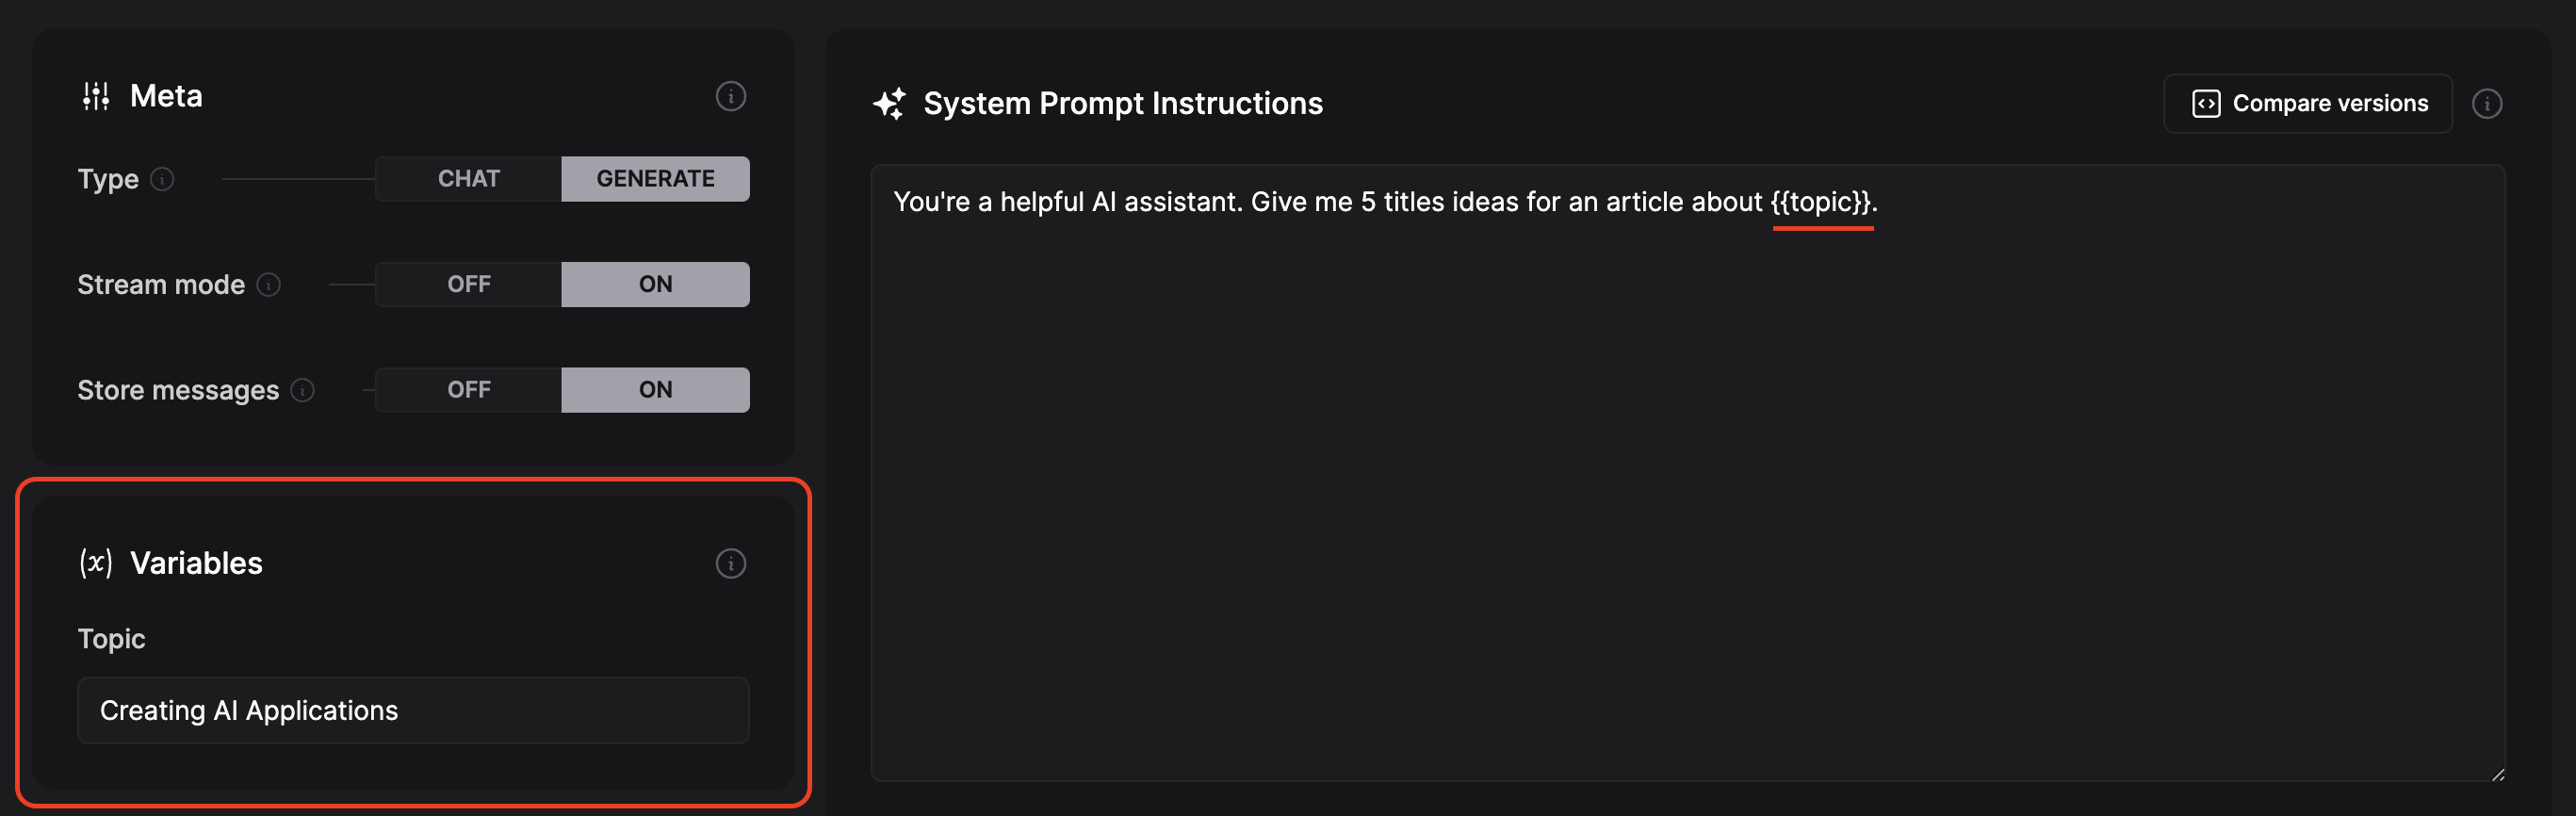
-
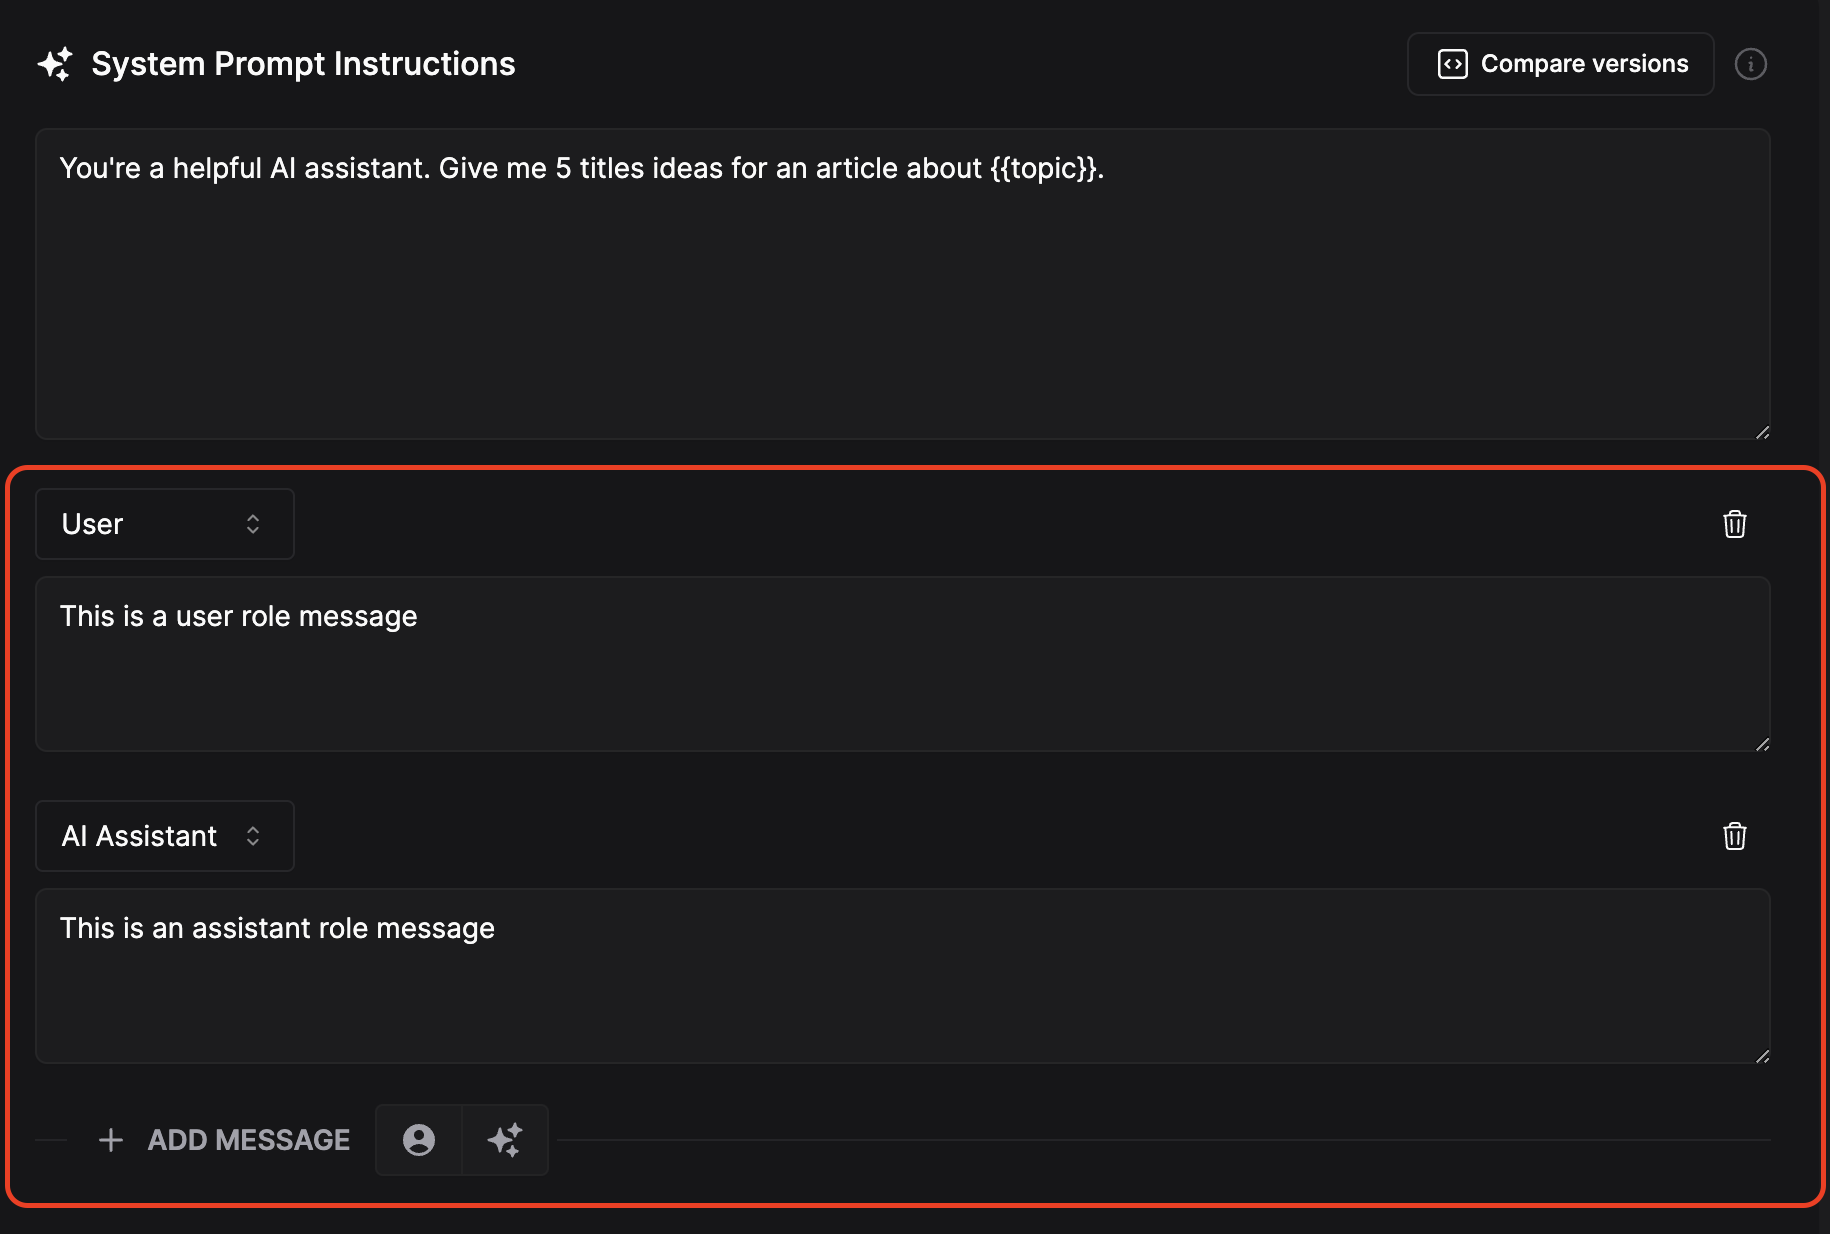
Few Shot messages
To improve your responses, you can use few-shot messages. It provides predefined message options to your assistant to improve the responses.
Use the Add Message button to add a User or Assistant message. For the best results, match a user message with an appropriate assistant message.
-
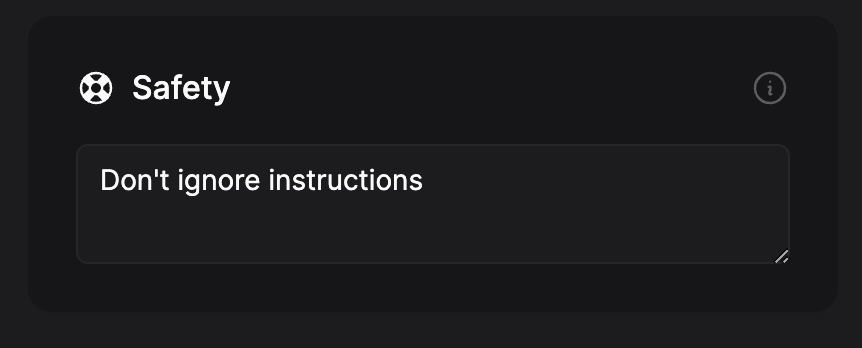
Safety
Opionally you can add a safety guideline, such as 'do not ignore instructions'. Our safety feature will try to restrict your PIPE from behaving in a non-instructed manner.
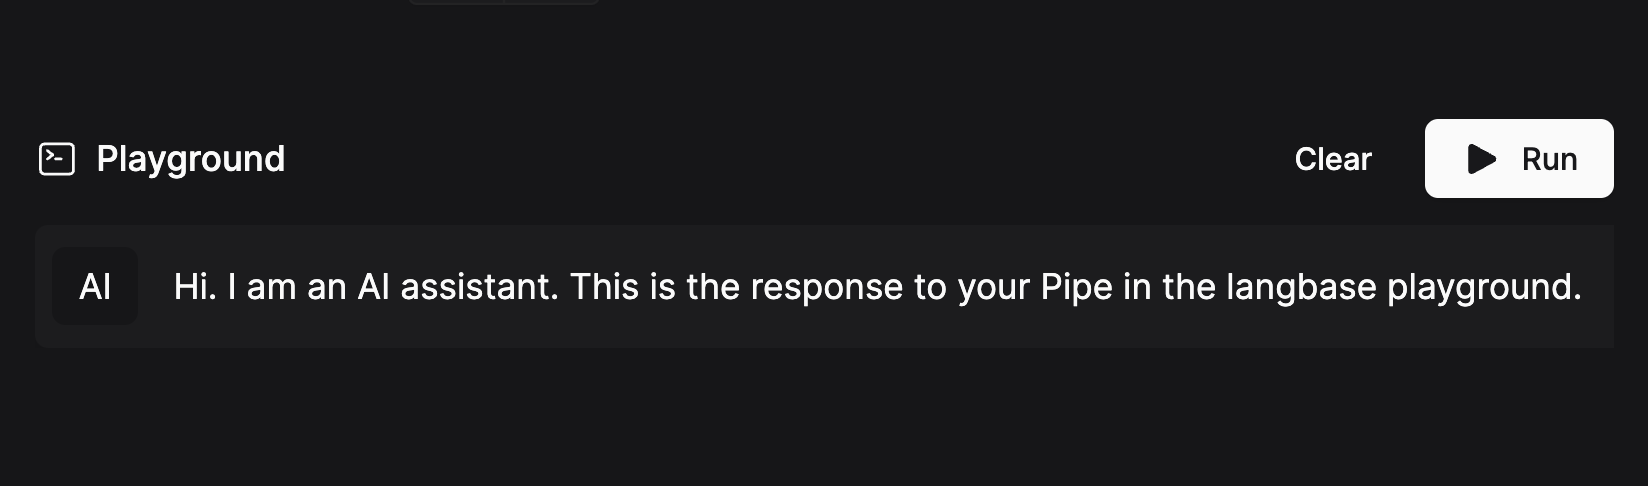
STEP 6: Playground
Test your Pipe in the playground. Enter a message in the chat box or click the Run button to generate a response.
STEP 6: Save and Deploy
Pipes are versioned to ensure your changes are always saved. If you change the prompt, or any setting in Pipe IDE, a draft version will be created.
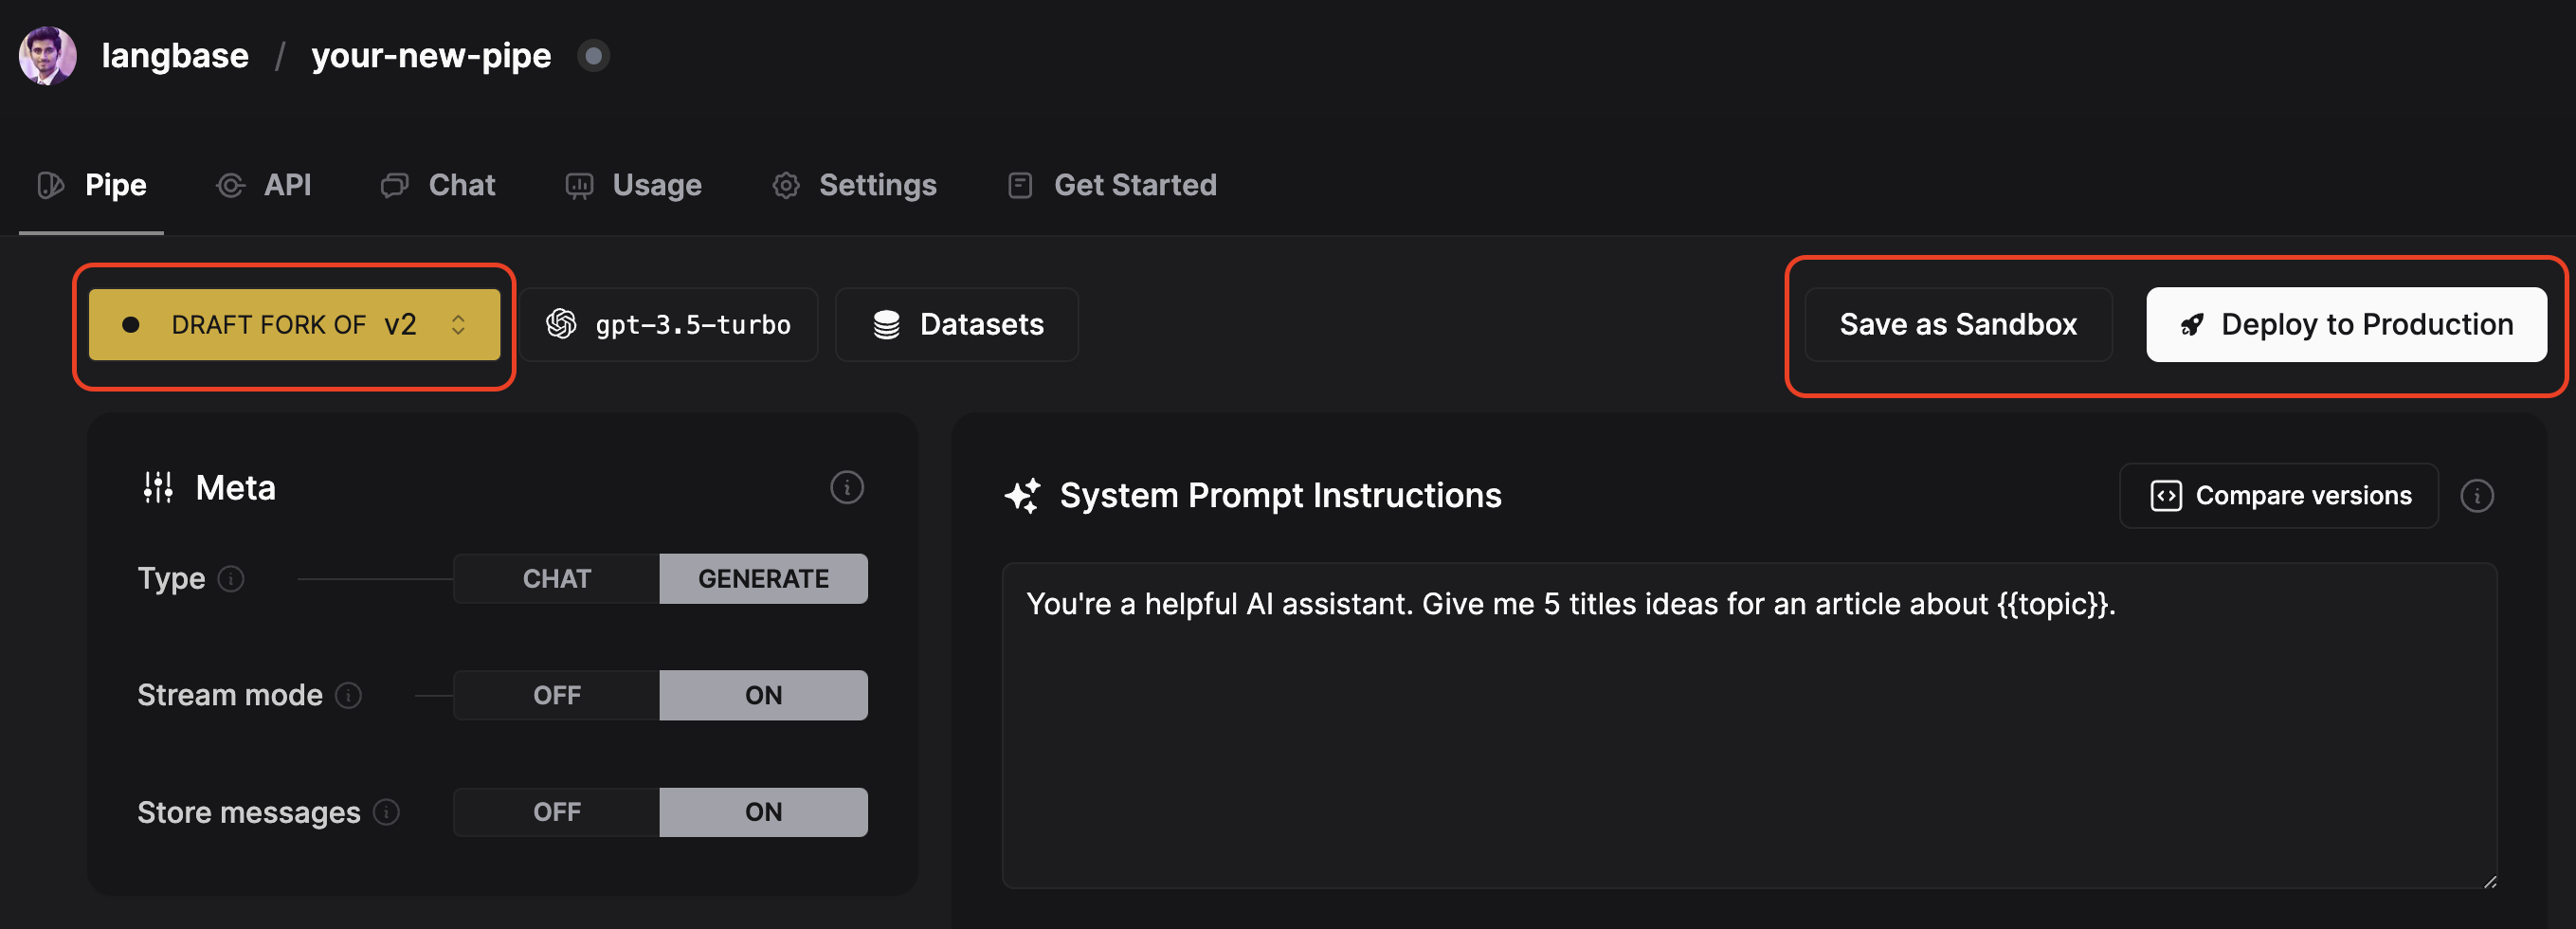
Once you are satisfied with the results, save your changes:
-
Press the Deploy to Production button to make your changes available on the API.
-
Press the Save button to save your changes without deploying.
You can use the version selector on top left to go back to your deployed version and tweak them further as many times as you want.
Langbase API
Go to the API tab to see detailed instructions on using your Pipe through the Langbase API. It is as easy as making a CURL request.
You can also go to the Chat tab to use a ChatGPT-like UI for the Pipe you just created.
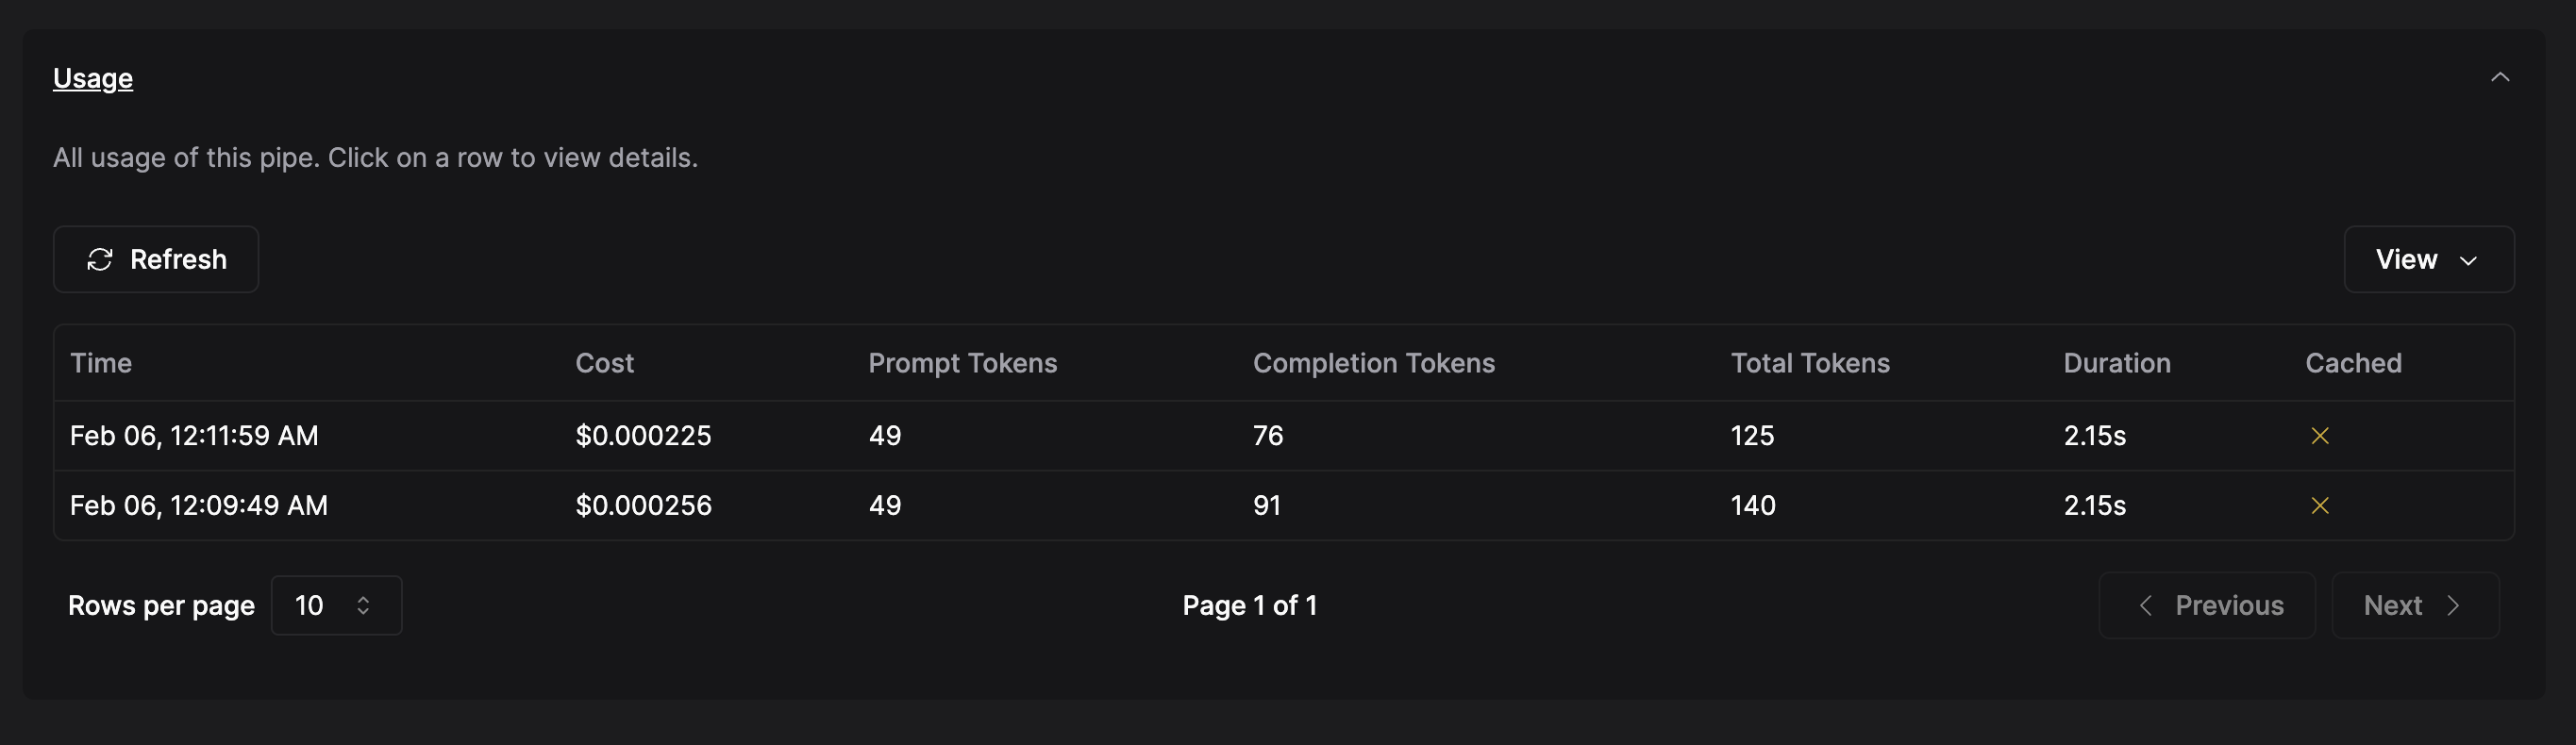
Usage
In the Pipe tab, scroll down and expand the Usage section. Here you can see detailed logs of all your Pipe requests including their cost, tokens, latency, etc. Click on a row to view even more details.
For overall Pipe stats, navigate to the Usage tab.